Creating & Managing Your Vaults
A vault is a package you're preparing for specific people. Not a folder you file things in — a delivery. You decide what goes in it, who gets it, and when it reaches them.
That distinction matters more than it sounds. Your records — your accounts, policies, IDs, wishes — live in your categories. Vaults are how those records travel. The same life insurance record can go to your spouse in one vault and your attorney in another, without you entering it twice.
All vault content is encrypted so that only you — and your chosen recipients — can decrypt it. IronClad Family cannot view, recover, or access your files.
Create as many as you need. Most families build them around people rather than topics — one for the household, one for the attorney, one for emergencies, one for a specific child.
Each vault supports up to 4 recipients. Since vaults are unlimited, you can create separate vaults for different groups — giving each person exactly what they need, and nothing more.
How to Create a Vault
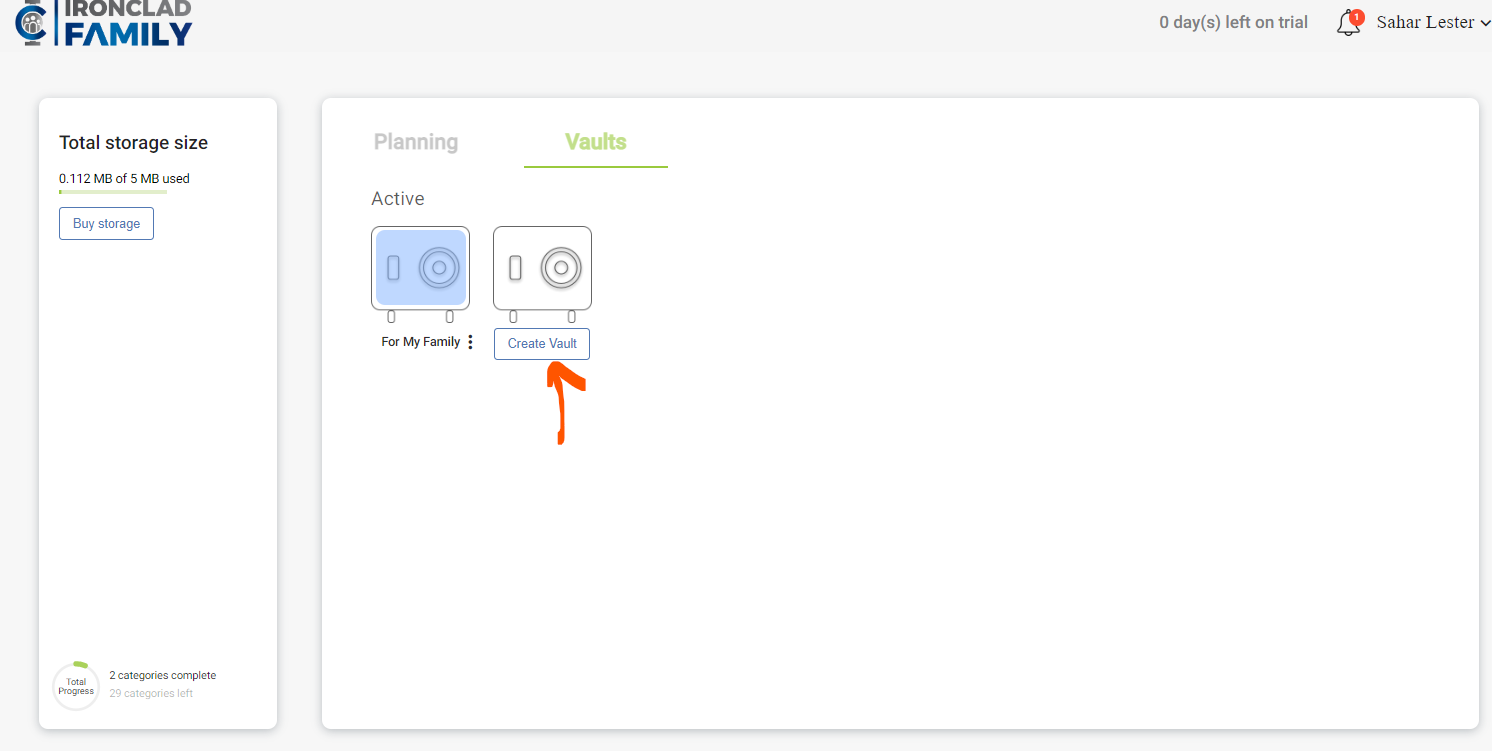
- Go to the Vaults tab in your dashboard.
- Click Create Vault.
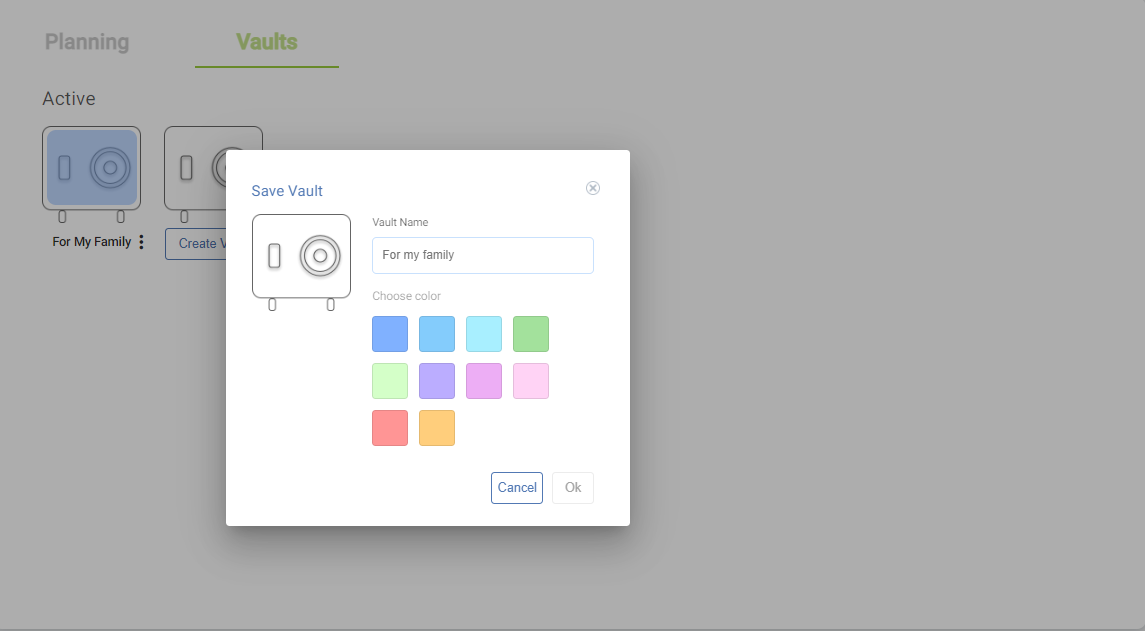
- Enter a Vault Name.
- Select a Color. This isn't decoration — the color follows the vault everywhere, including onto every record card assigned to it, so you can see at a glance where something is headed.
- Click OK to save.
Managing Your Vault
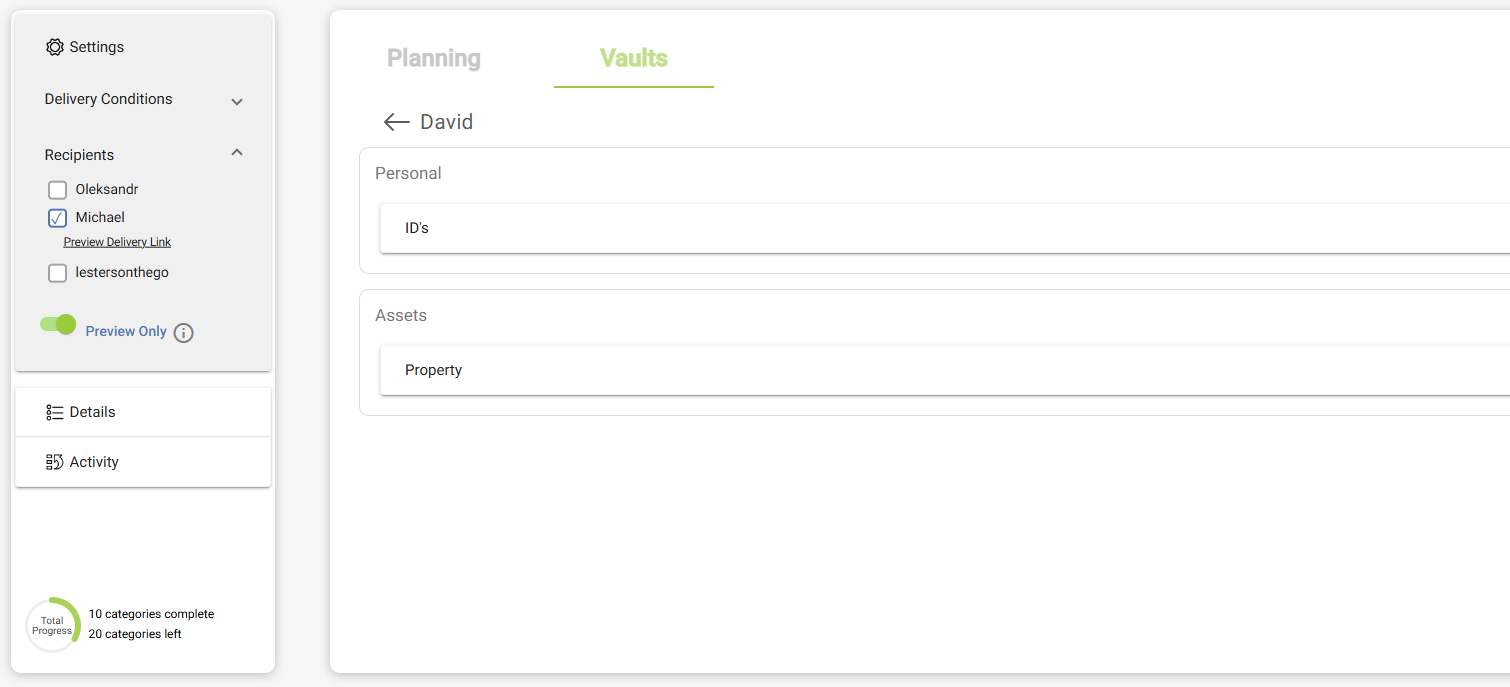
Click a vault's name to open its settings. You'll see four tabs:
- Delivery Conditions – when the vault is released
- Recipients – who receives it (up to 4 per vault)
- Details – what's inside, grouped by category
- Activity – a running log of every change
Putting Records Into a Vault
This is the part that's changed, and it's worth reading even if you've used your vault for years.
You no longer upload files into a vault. You create a record in the category where it belongs — a bank account under Assets, a passport under Personal, your will under Legal — and then choose which vaults that record should reach. Two ways to do it:
While you're creating the record.
At the bottom of every form is a section headed ? Assign to vault — who can receive this record. Each vault appears with its color dot, its name, and the recipients currently attached to it. Tick every vault that should carry this record.
After the fact.
Open the ⋮ menu on any saved record card and choose Assign to vault. Same checkboxes, no need to touch the fields you already filled in.
Tick more than one when it makes sense. Your will probably belongs in the family vault and the attorney vault. Your medical information belongs in the emergency vault, where it can be released immediately, and likely the family vault too. One record, several destinations — you're not making copies.
Setting Delivery Conditions
Delivery conditions determine when your vault is released to its recipients. Choose one of three:
- Death or Incapacitation – the default, and what most vaults use
- Specific Date – a birthday, a graduation, a milestone you want to reach even if you can't be there
- Deliver Now – immediate release
Different vaults should usually have different conditions. An emergency vault holding medical information is worth releasing on request — it does no good sitting sealed while someone's in an ambulance. A vault of letters to your daughter might be dated to her twenty-fifth birthday. Set each one according to what it's for.
Once a vault is delivered, it becomes a permanent, locked record of exactly what you intended to share. No one — not a family member, not an advisor, not IronClad Family — can alter it after delivery.
This is not a restriction. It is a promise. Your wishes, your documents, your instructions are preserved exactly as you chose them — so they can never be questioned or tampered with. We are on your side.
If anything changes in your life, simply create a new vault. Your account includes unlimited vaults.
For full delivery instructions, visit: Scheduling Delivery of a Vault
Sharing a Preview Before Delivery (Optional)
Before formally delivering a vault, you can share a preview link so recipients know what's coming. Two modes:
- File names only – recipients see what's in the vault but can't open anything
- Full content – recipients can view the actual contents
Worth doing at least once. There's a particular kind of relief in a spouse or an adult child knowing that this exists, that it's been thought about, and roughly what they'd be handed. It turns a future emergency into a conversation you've already had.
Assigning Recipients
Recipients are the people who receive your vault when your delivery conditions are met. They belong to the vault, not to individual records — which is why assigning a record to a vault is what puts it in their hands.
- Add recipients under the Planning tab before assigning them to a vault.
- Each vault supports up to 4 recipients.
- Need more than 4? Create a separate vault for a different group — vaults are unlimited.
- Update or remove recipients anytime before the vault is delivered.
Because a vault's recipients apply to everything inside it, think about the grouping before you start assigning records. A vault your brother-in-law receives shouldn't also be the one holding your account passwords. Separate vaults, separate audiences — that's what keeps each person seeing only what you meant them to see.
Learn how to set up recipients here: Adding Recipients to Your Vaults
Vault Details & Activity
The Details tab shows what this vault currently holds — every record assigned to it, grouped by the category it came from, so you can see at a glance that your Legal records made it in but you never assigned anything from Health.
It also shows the vault's name, creation date, color, and recipients. Read it as a checklist: is this actually everything the people receiving this vault will need?
The Activity tab logs everything that's happened:
- Records added, edited, or removed
- Documents attached, replaced, or detached
- Recipient changes
- Delivery condition updates
Account Permissions
The account owner has full control over all vaults. If another family member uses the same account login, they have the same level of access.
We are building the ability to grant another person their own separate account with owner-level access. This Delegate feature will be available in our next platform update.
Best Practices for Families
- Build vaults around people, not topics. Your spouse needs a different set of things than your attorney does.
- Start with four: a family vault, an estate or attorney vault, an emergency vault, and one for anything private going to a single person.
- Assign as you go. Tick the vault boxes while you're creating a record — it takes two seconds then, and it's the step everyone means to come back to and doesn't.
- Scan for unassigned records once a quarter. Any card reading “Not assigned to any vault yet” is information your family won't receive.
- Use the preview link. Let the people who matter see what's coming, so nothing about this is a surprise on the worst day of their year.
- Review after anything big. A marriage, a birth, a move, a refinance, a death in the family — each one changes who should be receiving what.
Related Articles:
Was this article helpful?
That’s Great!
Thank you for your feedback
Sorry! We couldn't be helpful
Thank you for your feedback
Feedback sent
We appreciate your effort and will try to fix the article