Family Vault Quick-Start Guide
Your vault is where the wills, policies, IDs, and account details live together — instead of scattered across drawers, filing cabinets, and three different cloud accounts nobody else can get into.
This guide takes you from “just signed up” to “our essentials are protected” in five steps. Give it an evening and you'll have covered the first seventy-two hours after almost anything.
You don't have to finish for your family to be safer. Get the top ten things in first — the main bank account, life insurance, everyone's IDs, your will, emergency medical info — and build from there.
Step 1 — Secure your account
- Set a strong password you don't reuse anywhere else
- Turn on two-factor authentication
- Make sure the email on your account is one you'll still have in ten years — not a work address
Everything you add is encrypted with your own keys before it's stored. Even we can't read it, which is the point — and also why your login matters.
Step 2 — Understand what you're actually building
Worth ninety seconds before you start, because it's not quite what people expect.
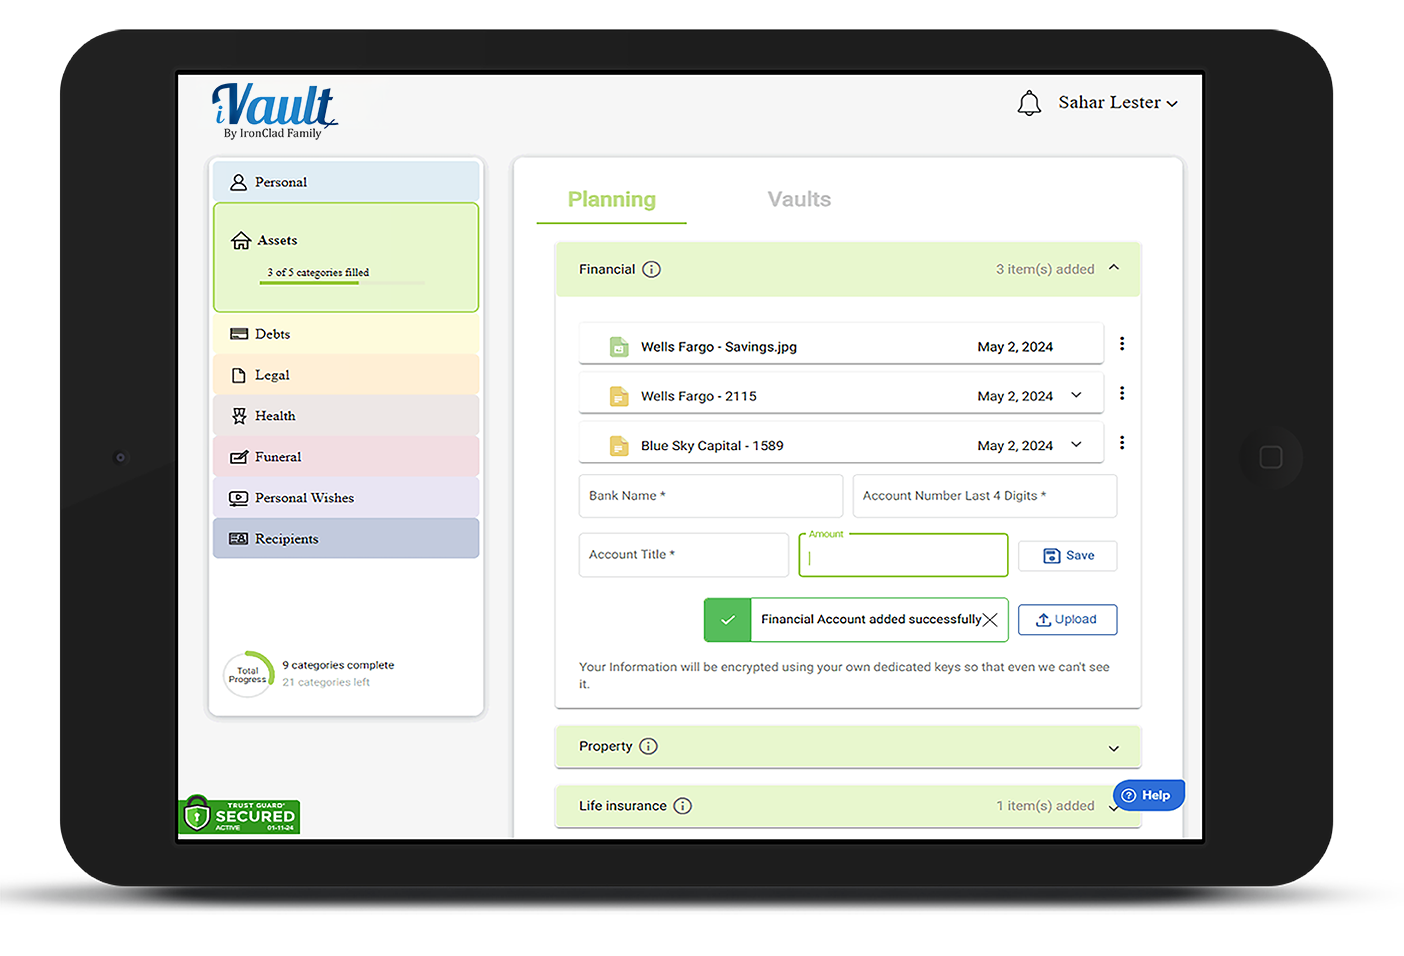
You're not uploading files into folders. You're creating records — the actual details of an account, a policy, an ID — typed into fields, with the document attached alongside.
The difference shows up when your family needs it. A photo of a life insurance policy means squinting at a PDF to find the policy number. A record puts the carrier, policy number, coverage amount, and beneficiary right there on screen — with the document underneath for when the company asks for proof.
Records live in eight categories down the left side:
- Personal — IDs, children & dependents, photos, online accounts
- Assets — financial accounts, property, life insurance, crypto, vehicles, business, valuables
- Debts — credit cards, mortgages, obligations
- Legal — will, trusts, power of attorney, health directives, guardianship
- Health — medical insurance, medical history, emergency wallet card, pets, elderly care
- Funeral — funeral instructions, burial plots
- Personal Wishes — messages to specific people
- Recipients — the people who'll receive your vaults
Each subcategory has its own form. A bank account asks different questions than a passport does — which is exactly why putting things in the right place matters.
Step 3 — Start with the life-or-death records
These are what someone would need in the first day or two of a crisis. Do these before anything else:
| Where it goes | What to add |
|---|---|
| Assets › Financial | Your main bank account — institution, last 4 digits, and the beneficiary the bank has on file |
| Assets › Life insurance | Carrier, policy number, coverage amount, named beneficiary |
| Personal › ID's | Passports, licenses, birth certificates — one per person, with expiration dates |
| Legal › Last will | Your will, or a note saying where it is and who drafted it |
| Health › Medical history | Blood type, allergies, current medications, doctors |
| Personal › Web & devices | Your primary email account — it's the master key that resets everything else |
Step 4 — Build your vaults and assign your records
This is the step people skip, and it's the one that decides whether any of this reaches anyone.
A vault is a package for specific people. Your records live in categories; vaults are how they travel. Most families start with four:
- Family vault — spouse and adult children
- Estate / attorney vault — executor and attorney
- Emergency vault — medical information, released on request
- A personal vault — anything going to one specific person
Each vault holds up to 4 recipients, and vaults are unlimited — so create more rather than crowding people into one. Add recipients under the Planning tab, and check their email addresses carefully; delivery depends on them.
Then, at the bottom of every record form, tick the vaults that should carry it. You can also do it later from the ⋮ menu on any record card › Assign to vault.
Learn more: Adding Recipients to Your Vaults
Step 5 — Add the instructions, not just the documents
Records say what you have. Instructions say what to do. The forms ask for both — and the instruction fields are the ones people leave blank and shouldn't:
- Who would care for them if you couldn't? — on every dependent and pet record
- What must a caregiver know in an emergency? — the thing you'd say in the doorway on your way out
- On death: memorialize, close, or transfer — on each online account
- Who should make these arrangements? — on your funeral plan
- Where recovery phrase is stored — on crypto, where there's no customer service line to call
Use Personal Wishes › Personal messages for anything that doesn't fit a form — a letter, a note, something you'd want said. You can set those to deliver on your passing, on a specific date, or right away.
Keeping it current
Once a year, or after anything big — a marriage, a birth, a move, a refinance, a death in the family:
- Update records rather than adding duplicates. Use the ⋮ menu › Edit details, and Replace to swap an outdated document for the current one. One record per real thing.
- Check that recipients' email addresses and phone numbers still work
- Look for anything still unassigned to a vault
- Fill in the date fields you skipped — renewal, expiry, and review dates surface in your weekly digest so nothing quietly lapses
Where to go next
- What Essential Documents Do I Need in My Vaults? — the full checklist, category by category
- How to Add Documents and Records to Your Vault — every field explained
- Setup A Vault — delivery conditions, previews, and recipients
- Create and Maintain a Last Will and Testament
Was this article helpful?
That’s Great!
Thank you for your feedback
Sorry! We couldn't be helpful
Thank you for your feedback
Feedback sent
We appreciate your effort and will try to fix the article