This is the fastest path to being productive in IronClad Family. Follow the steps in order — don't skip the Sample Data step.
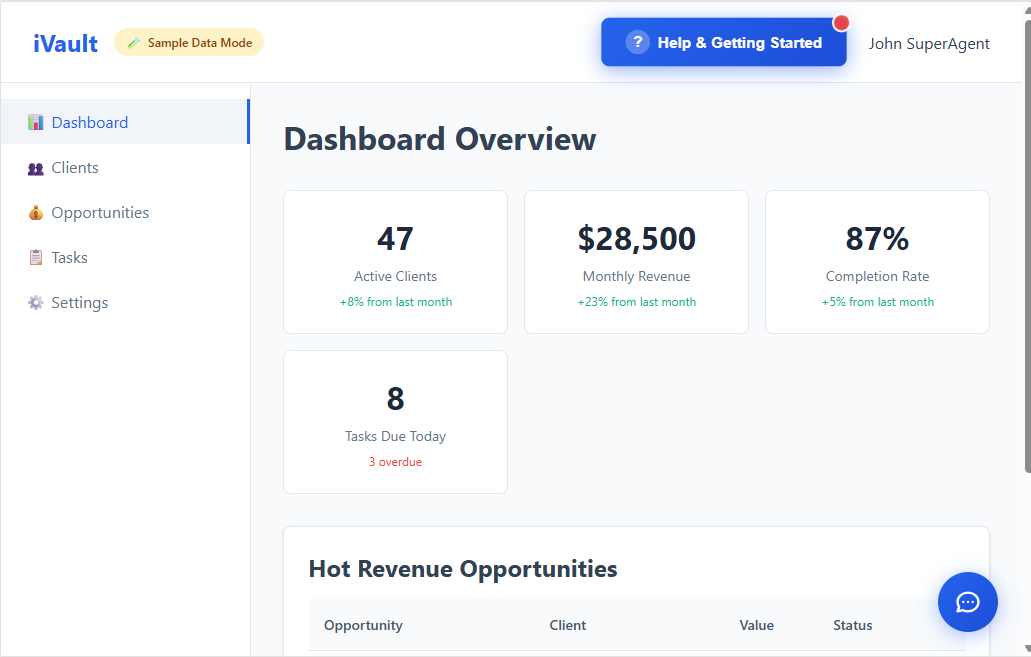
Step 1 (1 min): Confirm whether you're in Sample Data Mode
- Look at the top-left for a badge that says Sample Data Mode.
- If you see it, the clients and opportunities in your account are examples, not real data.
What to do next:
- Exploring? Keep sample data for now.
- Ready to onboard real clients? Clear sample data in Settings.
Step 2 (2 min): Open Help & Getting Started
- Top-right, click Help & Getting Started.
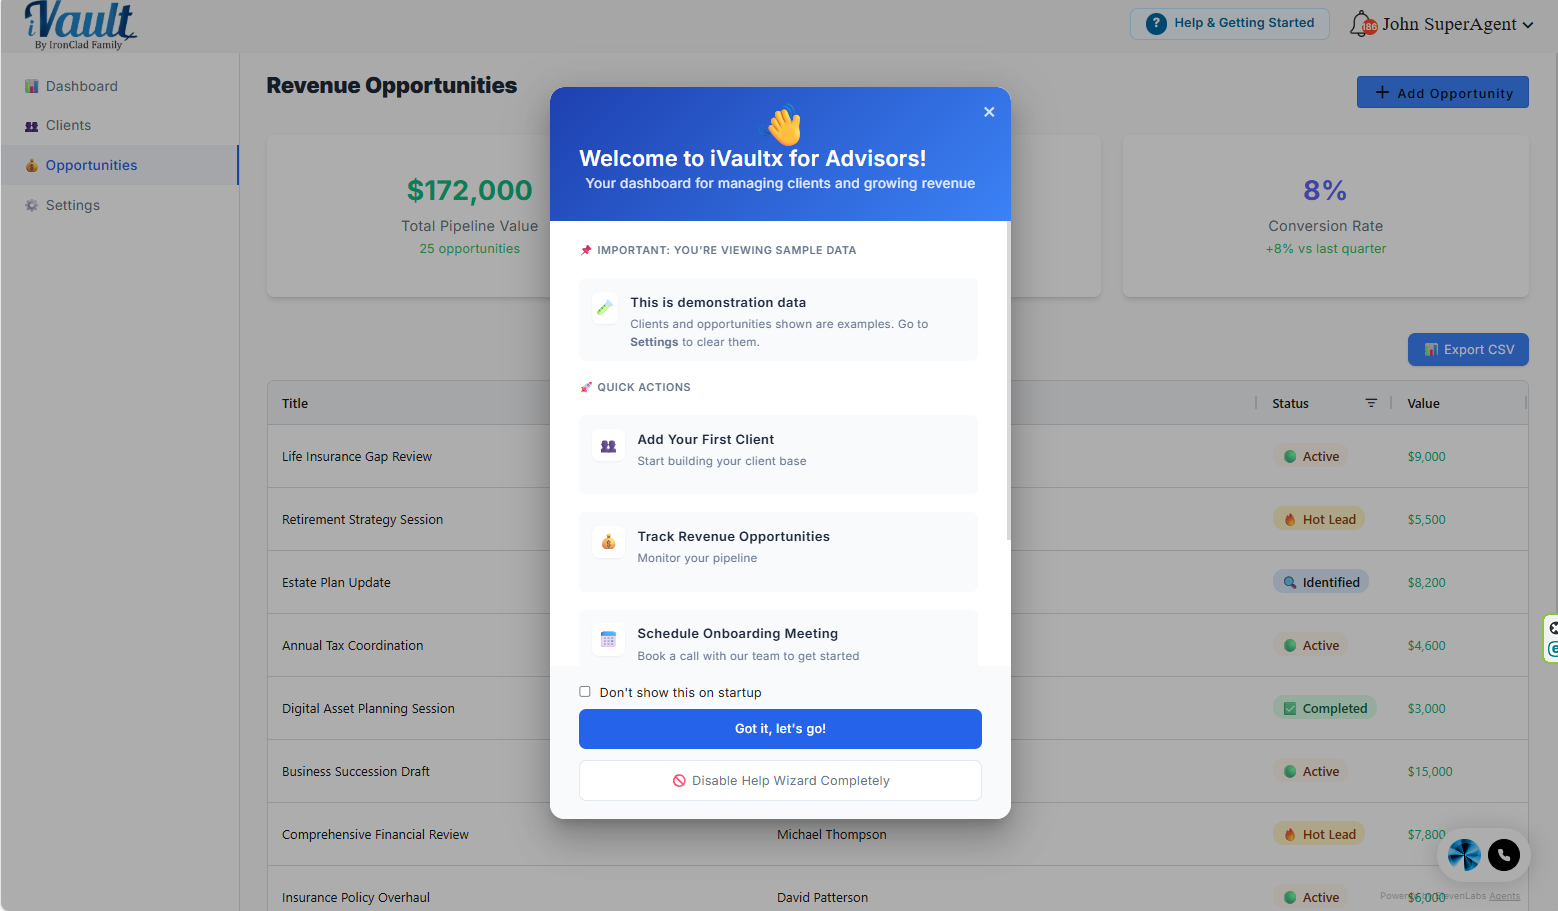
- This opens the guide linking to your key first actions (Clients, Opportunities, Settings, and scheduling onboarding).
Note: after you click Help once, the button becomes less prominent. That's expected — it's still available anytime.
Step 3 (3 min): Keep or clear Sample Data
If you're exploring: keep sample data and use the demo clients and opportunities to learn where things are.
If you're onboarding real clients now:
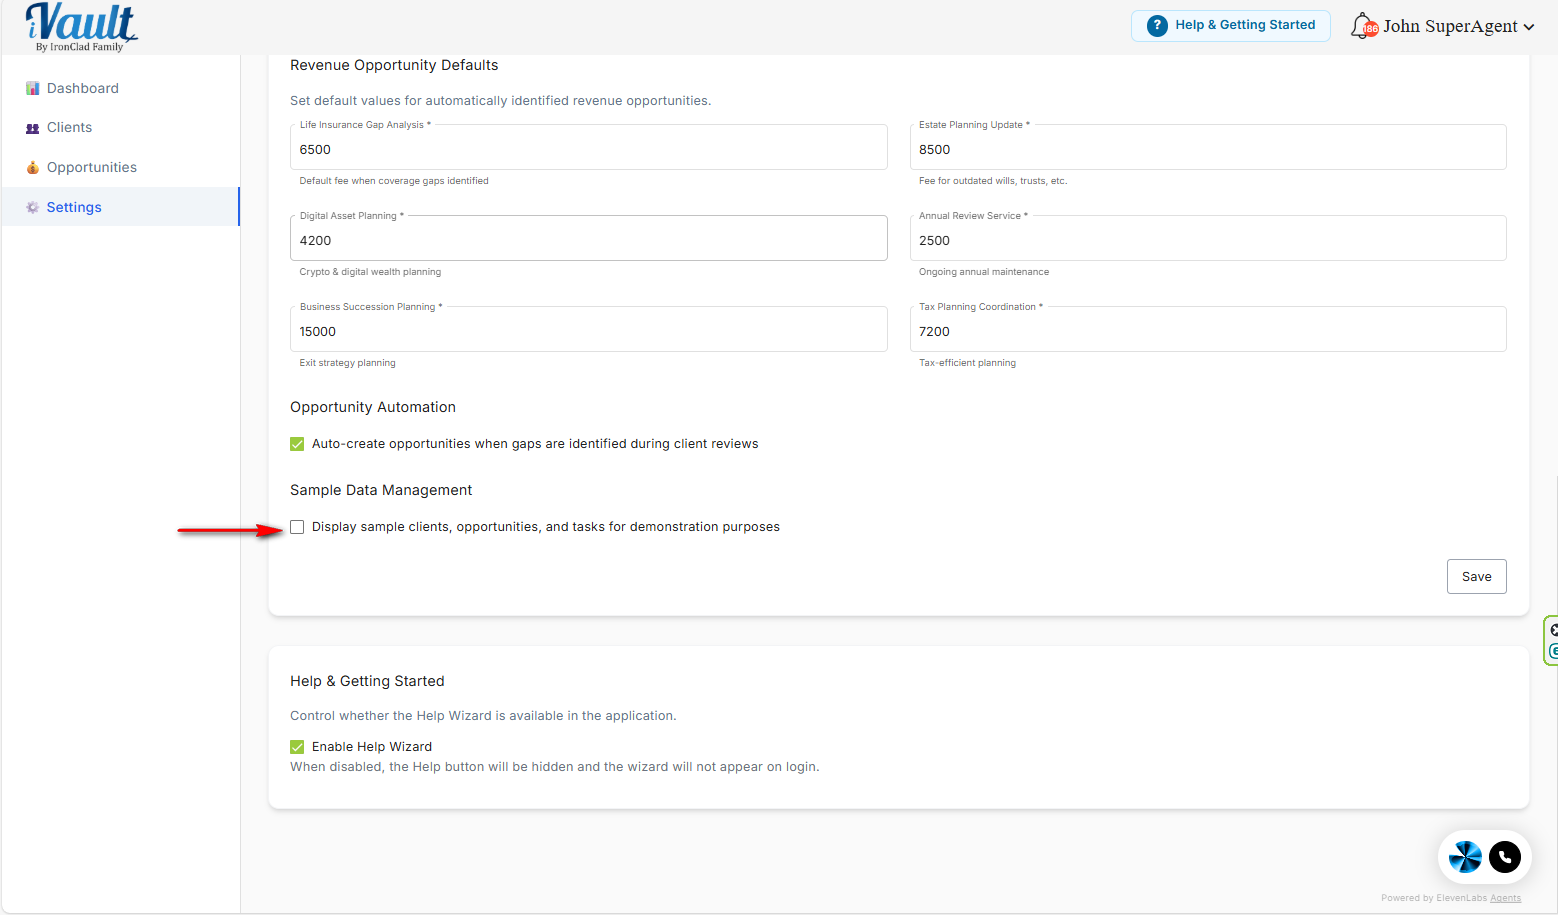
- Go to Settings → Sample Data Management
- Uncheck Display sample clients, opportunities and tasks for demonstration purposes
- Click Save
Step 4 (5 min): Add your first real client
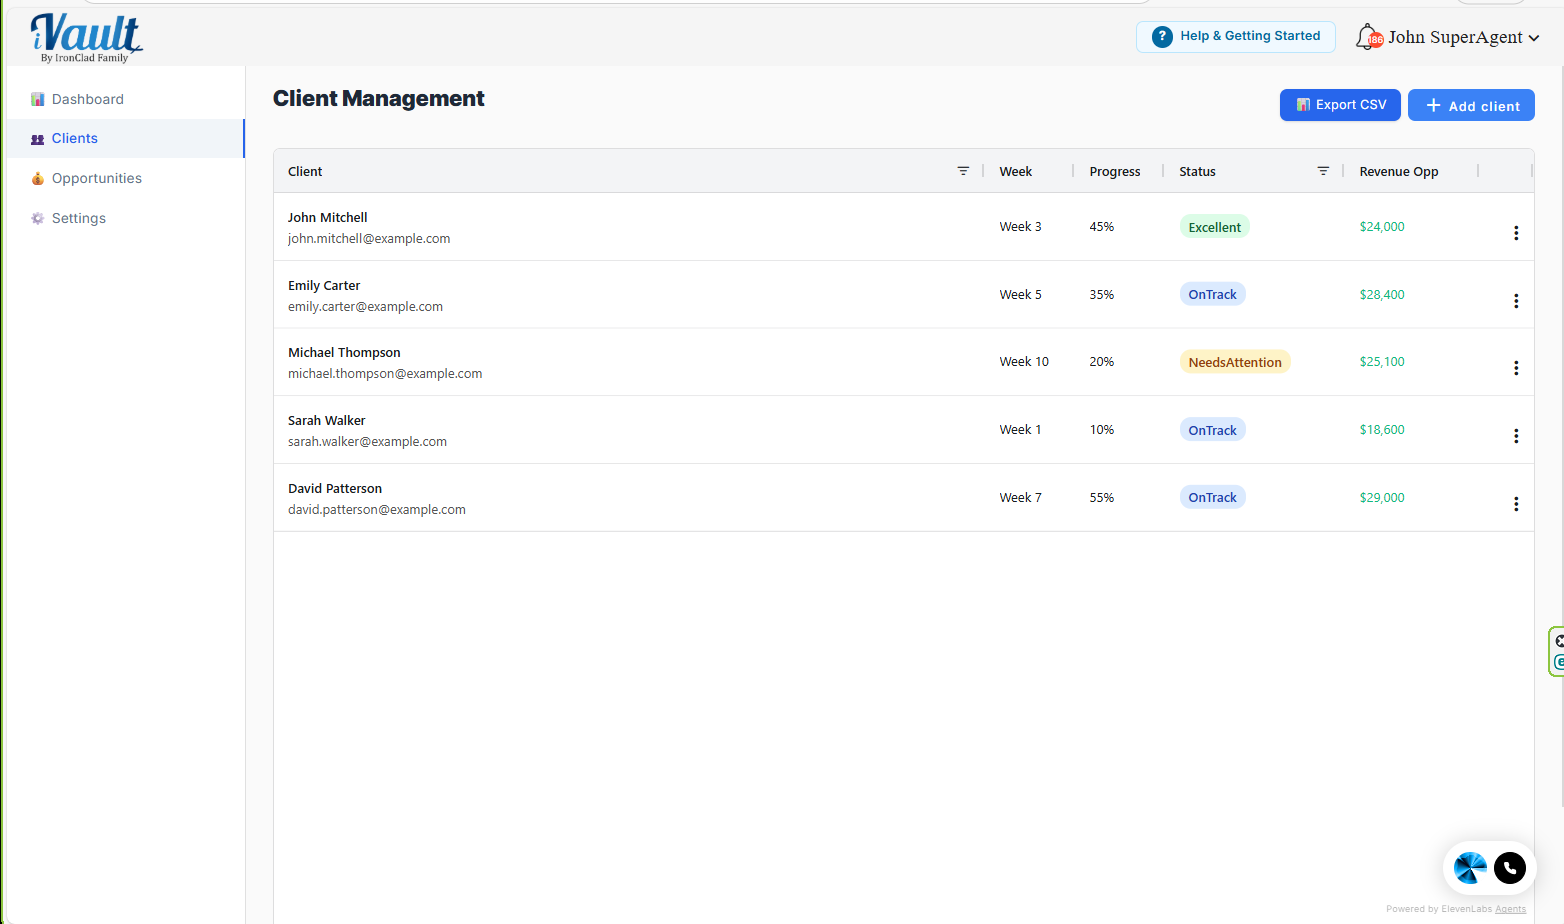
- Go to Clients
- Click + Add Client
- Enter the client's information and save
Best practice: start with 2–3 existing clients you know will engage. Early wins matter. Full detail in Adding a New Client.
Step 5 (5 min): Open the client vault and see how it works
This is the step that makes everything else make sense — don't skip it, even with a demo client.
- Open a client and click Manage vaults
- Note how it's built: records (an account, a policy, an ID) live in categories with structured fields, and vaults are what deliver those records to people
- Create one record — a financial account is a good first one — then use the Assign to vault picker at the bottom of the form to place it in a vault
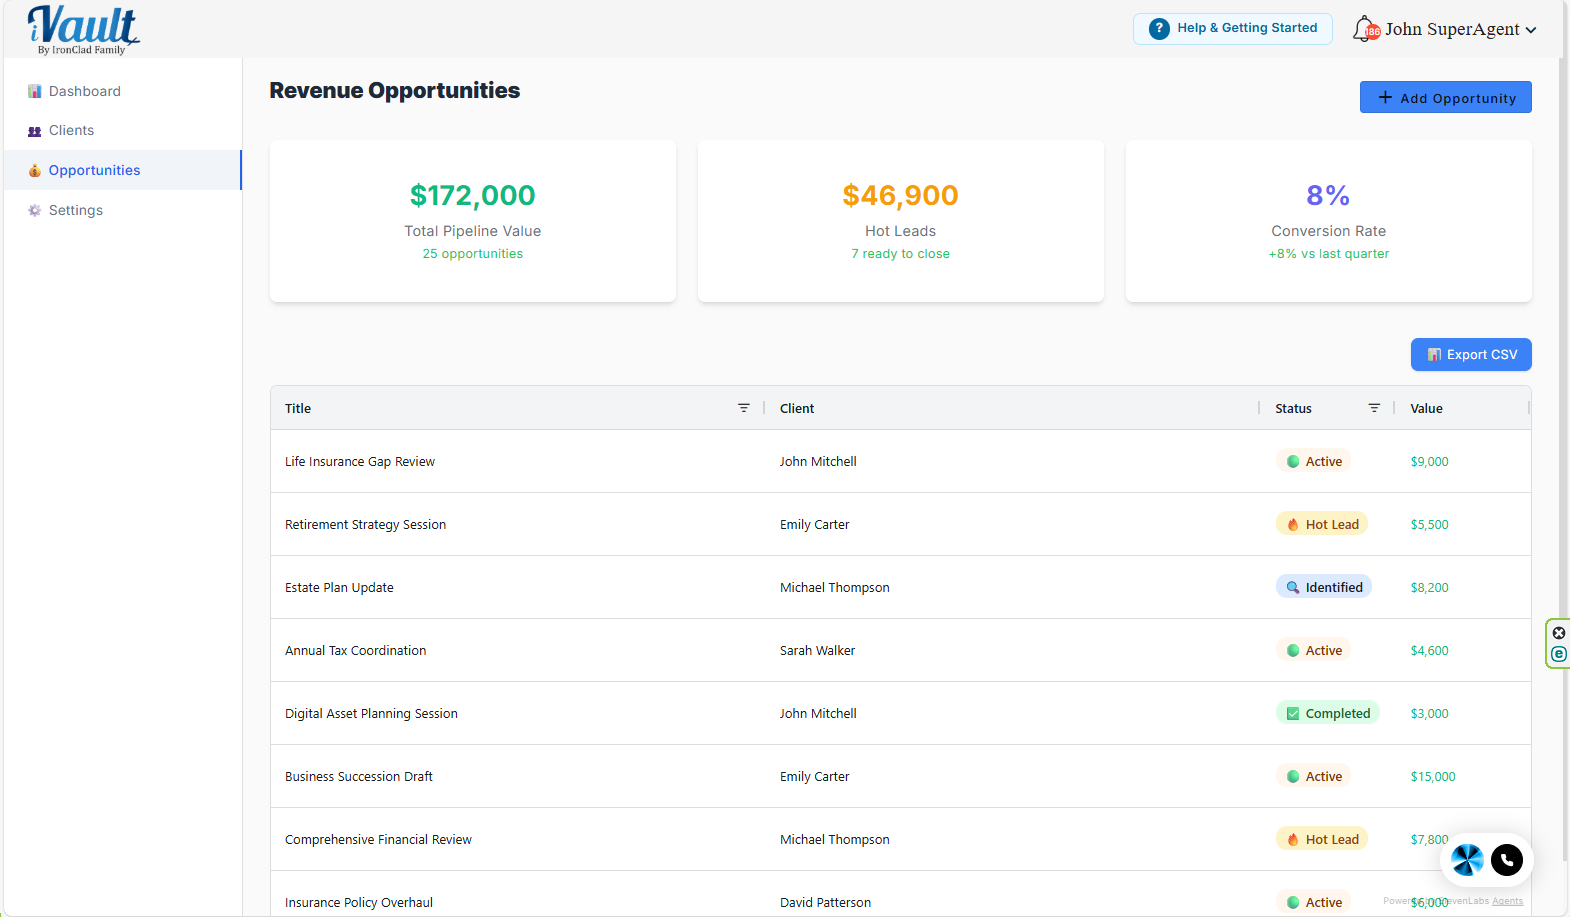
Step 6 (3 min): Add your first revenue opportunity
- Go to Opportunities
- Click + Add Opportunity
- Add a clear title, link it to the client, and enter an estimated value
Best practice: pick one definition of “value” and use it consistently — a planning or engagement fee, a drafting fee, expected commission, or annual recurring revenue, whichever fits how you're paid.
The strongest opportunities come straight from what a client records: a beneficiary that conflicts with the will, or a coverage gap like a missing directive or unnamed guardian. Both are real planning needs regardless of how you charge — see Hot Revenue Opportunities.
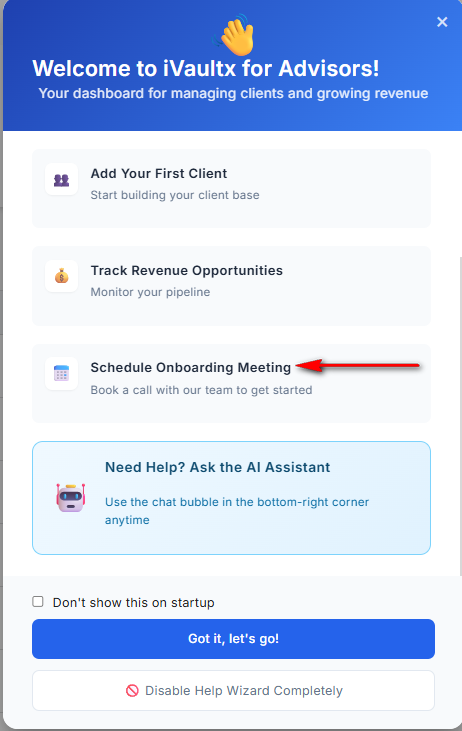
Step 7 (1 min): Schedule your onboarding meeting (recommended)
- Open Help & Getting Started
- Click Schedule Onboarding Meeting to book time with the team
Common issues
- I don't see Help & Getting Started: it may be disabled in Settings → Help & Onboarding.
- The welcome guide no longer appears on startup: you likely checked “Don't show this on startup.” Re-enable it in Settings.
- The Sample Data badge disappeared: sample data has been cleared (expected).
Next Articles
Was this article helpful?
That’s Great!
Thank you for your feedback
Sorry! We couldn't be helpful
Thank you for your feedback
Feedback sent
We appreciate your effort and will try to fix the article